Posts

Bareminerals bareSkin Complete Coverage Serum Concealer Review

bareSkin Complete Coverage Serum Concealer.

concealer01

I picked this up on a bit of a whim after seeing Shaanxo use it once in a video. I’ve been using the Nars creamy concealer for a while now and have repurchased a few times in my various shades.
With our crappy Australian dollar the price keeps going up and up for makeup. I had the urban decay naked concealer on my list to try next but refused to pay over $40 for one concealer.
Bare minerals swooped in and saved the day being only $29. I picked up the lightest shade in fair for when I’m too lazy to fake tan and medium golden for my tan times. I struggled to choose my shades though with little swatches online. Once they came I picked up medium as well.
The packaging is nice and simple. I really love the applicator. It’s a double sided doe foot which means I only have to re-dip once as it picks up so much product.
The makeup formula is so thin, but high coverage I was really surprised. It’s the first concealer in years I haven’t had to use a corrector under my eyes first for natural days. Being such a thin consistency it blends like a dream and never looks cakey.

bareminerals

Fair – I use this when I have no tan on under my eyes and on blemishes. It’s about the same shade as my skin so I don’t use this for highlighting
Medium – This is slightly lighter than my fake tan colour so I can use this for a subtle highlight. It is a bit pink toned.
Medium Golden – This is a yellow tone which matches my fake tan really well. I use this on blemishes and right under my eyes.

Smashbox L.A. Lights Travel Set Review & Swatches

I absolutely love the Smashbox highlight stick in Hollywood & Highlight. It’s a perfect neutral shade with just the right amount of pink, pearl and gold in it. This makeup blends like a dream over any foundation, shall I go on? So when I saw on Meccas website that there was a pack of the mini multitasking sticks in the other shades I just knew they had to get added to my cart.

This makeup set comes with 4 shades in a chubby stick type packaging for only $43. They are designed to be used anyway you like; blush, bronzer, lips, eyes, all that jazz. However some shades kind of only really work for one purpose.

Shade 1. Hollywood highlight

This is the one I have in the full size and I do find it a little harder to work with than the big one. It’s got the same gorgeous tone, but since I have to draw more lines as its smaller it moves my foundation and requires more blending.

smashbox03

Shade 2. Venice Beach Bronze

This bronzer is a gorgeous golden shimmer tone which looks gorgeous when it’s applied messily over the face. It does require a little more blending than some of my other cream bronzers. But it’s the only one I have with shimmer. It looks beautiful once you get it right. I find a mixture of a brush and the warmth from my fingers does a good job. This shade could also double as a bronze eyeshadow base, which I haven’t actually tried yet- just a thought.

smashbox04

Shade 3. Beverly Hills Blush

This lighter mauve colour would easily double as w gorgeous cheek and lip tint. It blends easily on the cheeks with a brush or fingers.

I find that when I apply it as a lipstick it sits in the lines in my lips. If I run a little all over my lips then it works better as a stain.

smashbox05

Shade 4. Malibu Berry

I find this one very similar in application to the other blush. It’s great for cheeks and a lip stain. Easy to blend and a pretty berry tone.

smashbox06

All in all I’m pleased I picked up some other shades, but glad they’re only mini’s. The highlight is reached for daily, but the others are not here or there.

smashbox07


(l-r Hollywood & highlight, Beverly Hills Blush, Malibu Berry, Venice Beach Bronze)
If you’re getting into makeup creams and want some easy to use convenient chubby sticks I would recommend this set to have a play with.

Bare Minerals BareSkin Sheer Sun Serum Bronzer Review

BareSkin Sheer Sun Serum Bronzer.

I recently saw this when browsing Mecca Online. Unfortunately I was unable to find any reviews on it. Seeing as I loved the limited edition Loreal Liquid Bronzer so much, I decided to grab it anyway. It is limited edition and retails for $41.

It comes in a little bottle, the same as their serum foundations. I liked the gold lid, it’s super cute. You have to shake well before using it. I assume this is due to the serum. It comes out a tiny hole, one drop at a time.

bronzer02 bronzer03
I find one drop easy does one half of my face, cheek, forehead and a swish on my nose. This universal makeup shade is a gorgeous warm bronze which stands out in all the right ways against my pale skin. However when I fake tan (which is always) it’s much more subtle. This works well for me as I try to go for quite a ‘natural’ skin look day to day.
I love to swirl this all over my cheeks with a Real Techniques Duo Fibre Brush and then dab over with my foundation sponge to make sure it’s all seamless. I can’t comment on the ‘serum’ aspect, but this is a gorgeous makeup bronzer for light to medium skin tones.

Monthly Makeup & Skincare Product Favourites

So no monthly favourites video this month as I spent the last week in bed with the flu. So instead I thought I would share my favs here!

FullSizeRender

Becca Cosmetics, Champagne Pop

Jaclyn Hills famous #highlightonfleek has been an obsession when I’m fake tanned. I can just make it work when I don’t have fake tan, but only using it very sparingly. It’s so intense and beautiful I can’t wait to get my hands on some more Becca highlighters.

Aveeno Skin Relief Moisturising Lotion

This is very cooling and calming to the skin which was really awesome because at the start of the month my skin was super itchy due to allergies so it soothed my skin. The cooling properties make you a bit cold which is a downside for winter but will be awesome come summer.

Too Faced Perfect Nude Lip Pencil

I’ve loved this forever but it ran out a while ago and I finally replaced it and fell in love all over again. It’s a cool toned nude that is super long wearing. Makes a perfect base for lipsticks or worn on its own with a lip balm.

Thin Lizzys 6 in 1

This is a subtle yet build able bronzer which is great for no makeup days. I love wearing it when I am working at the gym or can’t be bothered doing a full face of makeup but need to give my face a little bit of colour and dimension.

Smashbox Photo Finish Primer

This fills in my pores so so nicely & gives me a silky smooth base to apply my makeup to. Not much else to say but I am considering splurging on the full size.

EX1 Delete Concealer

This corrector was in my ex1 foundation first impressions (click here to watch video) and since then I have been reaching for it all the time. Since it’s a yellow/olive tone & not a crazy orange it’s really easy to work with around my eyes and the tones help cover redness in blemishes too.

Sigma Beauty 3DHD Kabuki Brush

If you have seen my full face of first impressions video on YouTube you will recognise this brush. It has a cool double edge on it which I thought at first was gimmicky but it’s so handy and makes it my favourite foundation brush. The shape means you can hold it from below a little more relaxed and apply with one side then buff out with the other.

Carmex Moisture Plus

This has saved my lips from become disgusting while I was dying of the flu. Not once did I have chapped ‘sick people lips’ and I attribute it to this. Also put it on before bed every night and wake up with smooth lips.

Dirty Works Face Scrub

This is a very fine face scrub that leaves my skin feeling so clean and like every dead skin cell has been taken care of. It has a refreshing scent and leaves my skin super smooth.

Sigma Beauty Lip Base Indulgent

This is the perfect my lips but better nude. It’s very creamy for a pencil and can cover the lips and be comfortably worn all over without a lip balm. The size of the pencil means it can be easily used to line and fill in the lips.

Aveeno Night Cream

I picked up the day moisturiser from target the other day and have been enjoying the matching night cream. As my skin is quite dry it’s been nice having something a bit heavier but not too thick and greasy.

I hope you enjoyed this months favourites!

Dear Lashes Instagram and Youtube Giveaway

Hey everyone,

I am holding a give-away to celebrate reaching 1000 followers on Instagram! Yay!

AmeaMay1K Giveaway
And to make it interesting I have 3 ways which you can enter.
Instagram, YouTube and via my blog.
You MUST be following me on instagram since it is an instagram giveaway.

Instagram
To enter all you have to do is follow me on Instagram @ameamay and repost the image related to the giveaway with #ameamay1k and tag me @ameamay
There is only 1 entry per person via my instagram so that it is fair for everyone and doesn’t become spammy.

YouTube
Make sure you are subscribed to my YouTube channel and comment on my video about this giveaway!

Blog
Sign up to my website and comment on this blog post that you want to win!

Good luck to everyone!

Dear Lashes xx

Radiant Orchard Winter Makeup Tutorial

Hello everyone!

My name is Kirsty and I’m from Lipstick Addict! Dear Lashes and myself have teamed up to bring you two winter looks that are perfect for cold weather and also feature the Pantone Colour of the Year, Radiant Orchid. You can view my blog here to see Ameas look!

Given that Amea is a pro with eye shadow and I’m lipstick crazy, I’ve centered my look around a bold lip and she has centered her look around a bold eye shadow look! I’ve still created an eye look to wear with my lip, but I’m pretty useless at eye shadow so feel free to use it or not 🙂 Also please excuse my horrendous eyebrows, I’ve been growing them out and they’re being shaped next week!

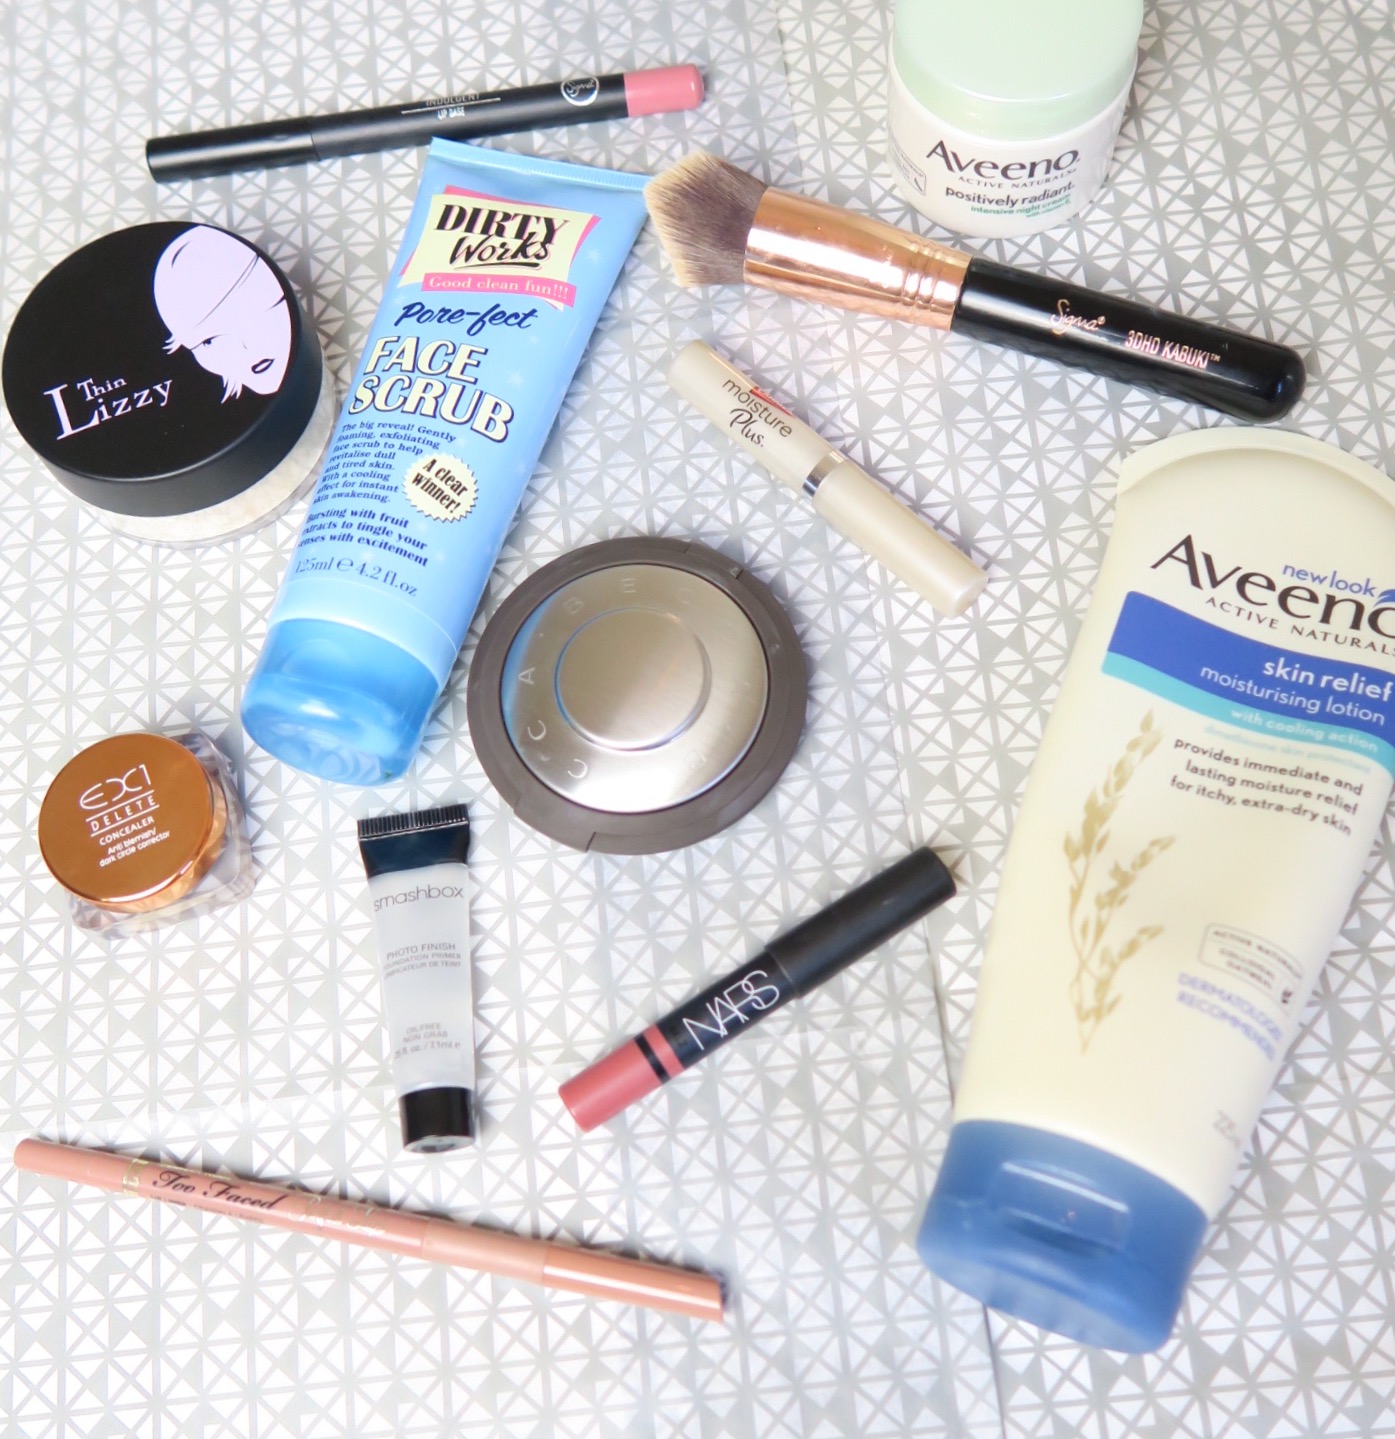
To begin, here are the products I’ll be using for the day. I’ve tried to keep it mainly affordable and accessible for us Aussies!

To begin, I have already cleansed and moisturised my skin. It’s winter here and your skin needs all the moisture it can get, so don’t skip this step! Your skin needs all the love it can get! Now is also the time to put on some lip balm, you’ll thank me later.

Step one is to prime! Not to prime is a crime – and today I’m using the Smashbox Photo Ready Light Primer. This is a great, light and hydrating primer, prefect for everyday use.

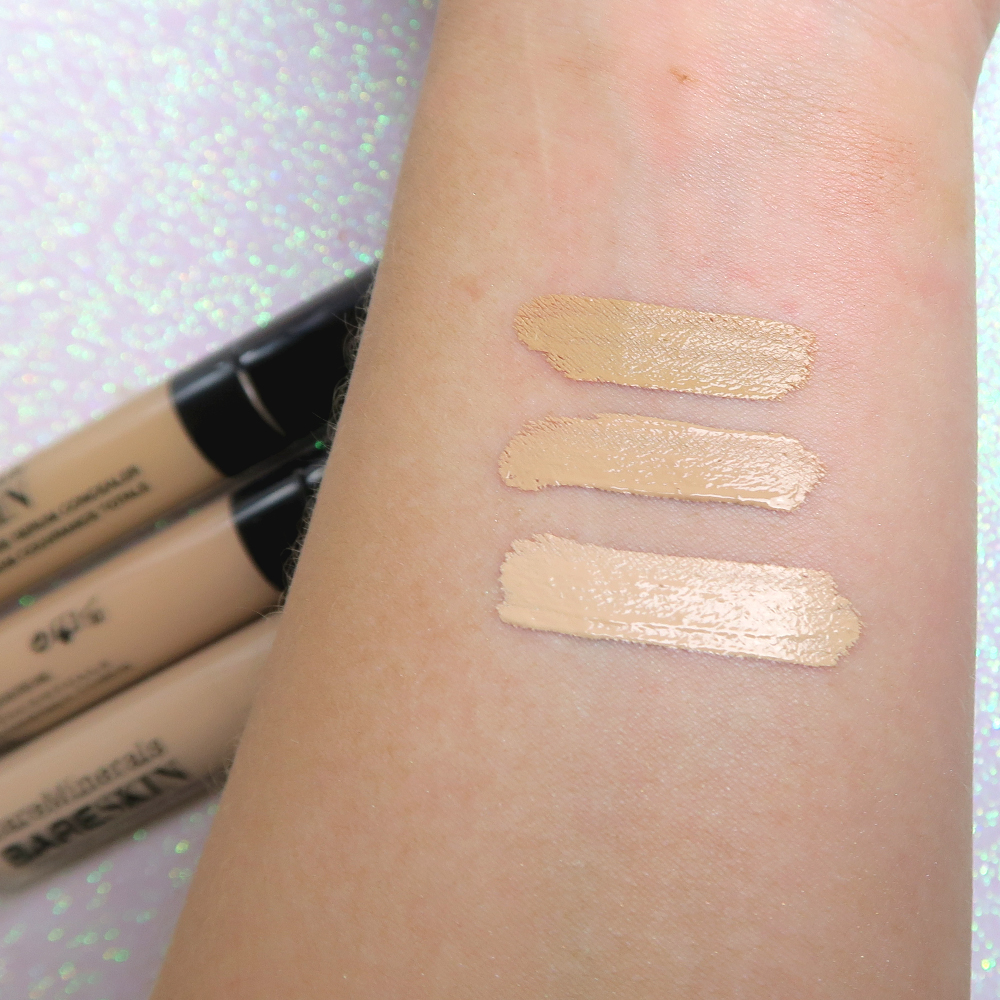
Step two is to lay down the base. When I wear a bold lip colour I find it seems to highlight any imperfections that I may have and occasionally wash me out. So when I put on my foundation and concealer, I do a little more coverage than I usually would for day wear. Today I’m using the Chi Chi Fabulous and Flawless foundation and the Maybelline Age Rewind Concealer. I just used my Sigma F80 to stipple on and then blend in my foundation. Buffing is key! I want a fuller coverage face but I don’t want to look like I’ve caked it on.

My concealer is doing several jobs today: concealing, subtle highlighting and priming. I use a lighter shade to bring some subtle light to my face and by popping it on my eye lids I’ve primed for my eye shadow too! Finally I set it all with my Face of Australia Translucent Loose powder, to ensure my products are set and won’t budge.

Step Three is to fill in those brows. Use your usual brow products, mine is the Jordana Brow Powder and Essence Lash and Brow gel. My brows are in the process of being grown out before they are shaped so they’re sort of a horrid mess. Please excuse them! Do make sure you use a brow gel of some sort so your brows stay in place all day.

Next up is eye shadow. I apologise that my skills are lacking, I’m not fantastic and I never have been when it comes to eye shadow! All I’m aiming for today is a neutral eye with a bold liner. There are photos and a step by step guide available for you if you choose to use this look, otherwise, any neutral eye will work.

1.       I’ve begun with the light, matte cream colour (#7 from the left) from the Naturals palette and packed it all over my lid with a flat shader brush.

2.       Next I’m blending a matte, neutral brown (from the Nudes palette, #3 from the left) into my crease with a fluffy blending brush. Nothing too harsh, just some subtle depth to the look. I’ve also brought this in to my outer third of my eye and outer V.

3.       Taking the same matte cream colour, I’ve highlighted under my brow.

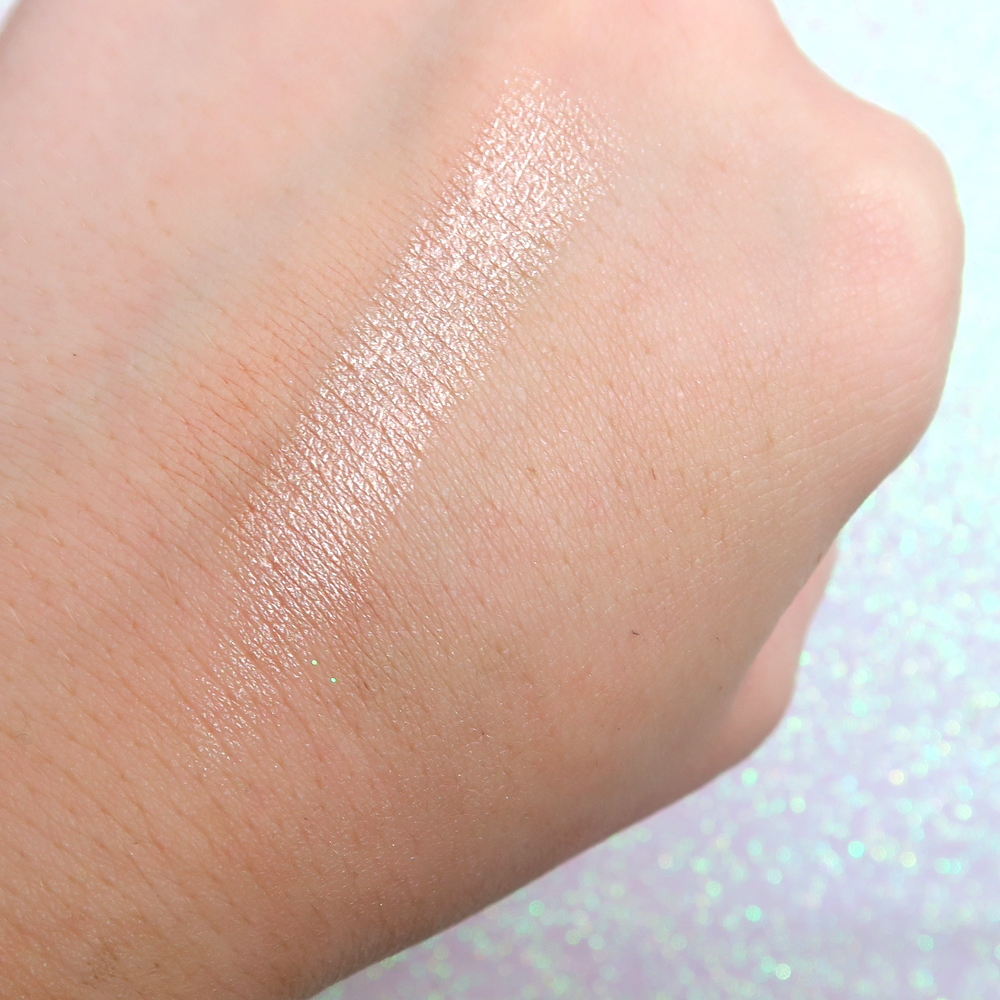
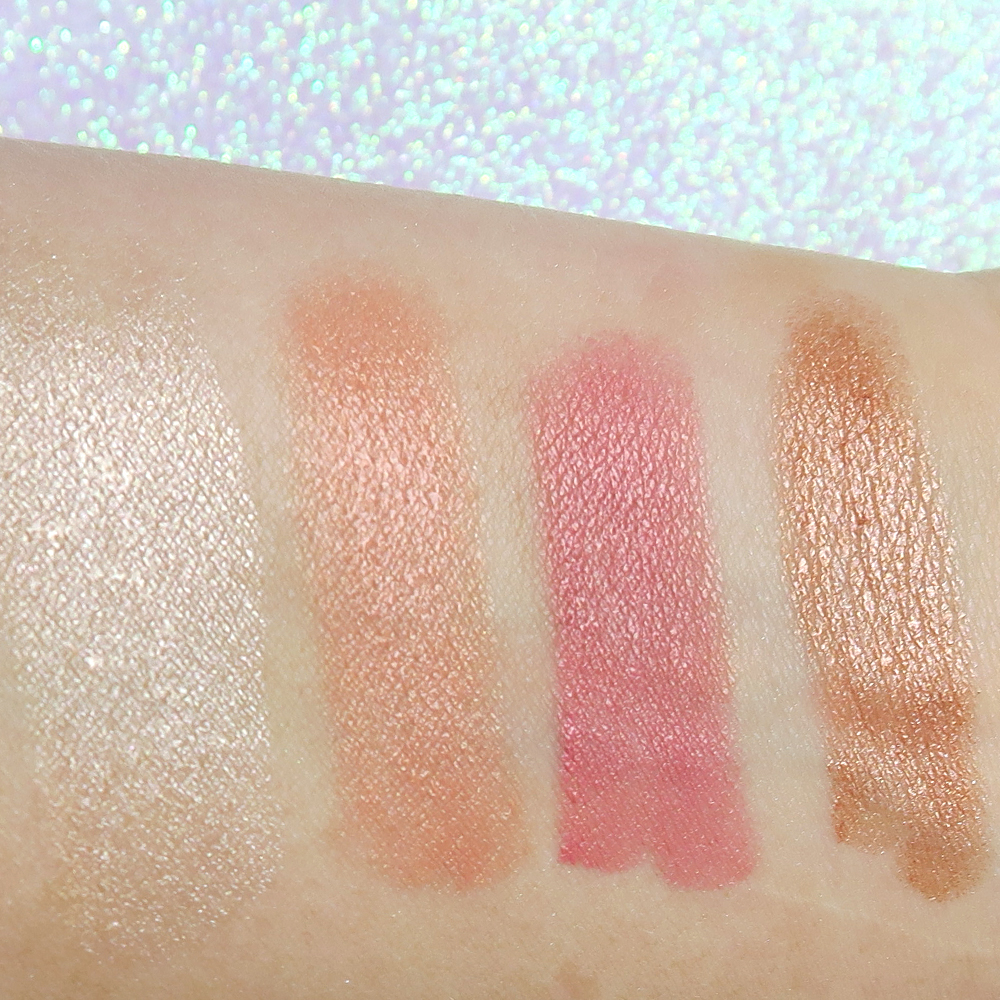
4.       This step is optional but I feel it brings a little life to the look, I’ve taken a shimmery gold and popped it in to my inner corner! Gold is a flattering colour for me and helps to highlight my inner corner also. (I mixed colours #6 and #11 from the Neutrals for this step)

5.       Taking a pencil brush and the same matte brown, I’ve brought a little down to my bottom lash line and connected it to the gold!

6.       Tighline those eyes! I used my MAC Kohl Liner in Feline to do this. I feel like it ties in the eyeliner to my eye and leaves no little gaps.

7.       Winged liner is a must for me. I love winged liner with a bold lip for any time of year! I used my Maybelline Master Precise to draw a shorter but bold wing from inner to outer corner. Feel free to skip this step if you aren’t interested in liner!

8.       Pack on that mascara! I’m not using lashes today so I’ve put on two coats of my Maybelline Falsies on my top and bottom lashes.

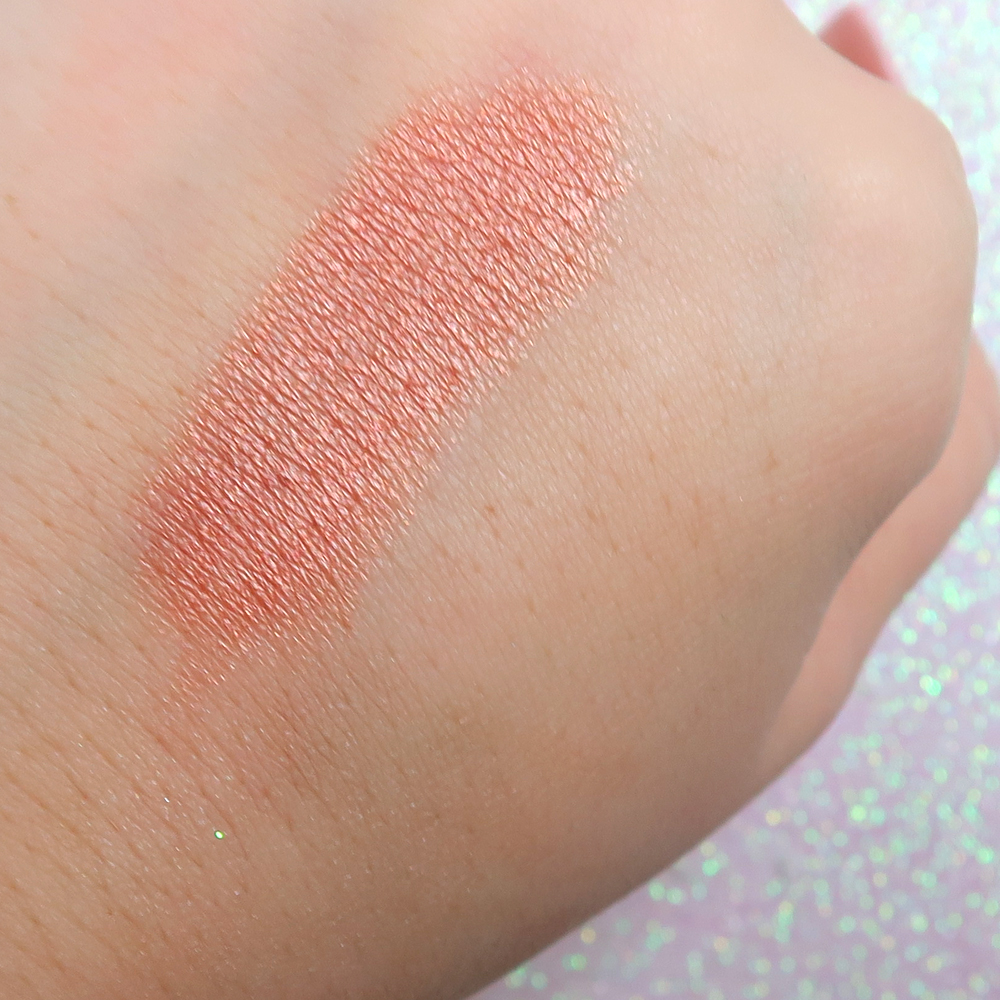
Okay out eyes are done! Next up is face. I’ve got my NYC Sunny bronzer and used it to warm up the sides of my face and also do some very slight contouring. Like I said before, when I wear a bold lip I find it occasionally washes me out, so this will bring some warmth and shape back to my face.

For blush I’ve used one from a Sleek Blush by 3 Palette, the blush is called Guiperre. It’s a peachy pink with gold reflect (much like NARS Orgasm) and will nicely compliment my gold eye shadow.

Last but not least is the most important step! The star of the show! The lipstick!

I’ve chosen my Avon Over Nature lipstick in Orchid Fantasy. It’s the perfect purple/fuchsia/magenta/orchid colour and the consistency is fantastic. I haven’t lined or prepped my lips in any way besides lip balm. This lipstick doesn’t feather and stains your lips so it’s not going anywhere.

And there we have it, my final look! I hope you guys liked my look and give it a go this winter. It was really lovely to be able to create this for you guys, so please tag me if you re-create it!

Come and check me out on my instagram and blog! My instagram is @_lipstickaddict_ and you can find my blog at lipstickaddict.com 🙂 Come by to say hi and also to see Ameas’ creation for you all.

Lovely to meet you and I hope you stop to say hi soon! Comment below to tell us what you thought of our looks!

Love, K xo

Perfect Palette TAG on Youtube

Wow so this TAG is amazing. I am was so excited to do it, even though it was SO MUCH harder than I ever could have imagined.
I tried not to cheat on this.. But.. This was hard!

Best Packaging- Urban Decay Naked 3

Naked 3

I absolutely LOVE rose gold. So not only are the Eyeshadows on the rosy side but the packaging!
This palette also snaps closed probably so you don’t have to worry about it swinging open and getting destroyed

Naked 3

Best Color Payoff- Napoleon Perdis Prismatic Quad #5

napoleon quad 5

Most of my favourite palettes have impeccable pigmentation and colour pay off.
I chose this one though as I wanted to include it in this tag as they are definitely palettes worth checking out! Also can be used wet for an even more intense pigment.


Most Versatile- Too Faced Chocolate bar

too faced chocolate bar

This palette is the most amazing thing I own at the moment.
1. Smell
2. Pigmentation
3. Great range

too faced chocolate bar

There is such a great variety of colours in this palette.
You’ve got your mattes, and shimmers; neutrals and more out there options.
This palette is also great for doing that thing where you look at the back of your hair in the mirror and see your reflection from the back (that’s so badly explained) and I sniff the chocolate while I’m doing that. So amazing.
The packaging on this is also to DIE for. But I love me some rose gold..

Best for Travelling- Chi Chi Nudes

When travelling I don’t think about the usual things that others do.
(Ie- small, lightweight, good variety etc)
I chose this palette for travelling because you can easily recreate a bunch of different looks with this as there’s a great variety of neutral shades. These colours should go with most occasion and outfit choices too.
But most importantly, it is super affordable! I don’t know about you, but if I took an expensive palette on holiday and my bags got damaged or lost I would be heartbroken (which is why most of my make up comes in my carry on)
But the Chi Chi palettes are so affordable that I could easily replace this without wrecking the bank!

Biggest Regret- NARS the happening

NARS The Happening

The Eyeshadows in this palette are very average in quality. I did get it mainly for orgasm and Laguna, however I have accidentally got my bronzer brush in the edge of the eyeshadow more than once and destroyed my face. I wish that I didn’t get this palette and instead the Guy Bourdin one night stand. Or the individual colours. Unfortunately when ordering online these things just happen.

NARS The Happening

Best Colour Names- Urban Decay Naked Basics

Urban Decay Naked Basics

I don’t have THAT many palettes as compared to some people. My urban decay palettes are pretty much the only ones that even have names. So they kind of win by default.

This I would also take travelling, 100%

Least Used- Lime Crime D’Antoinette

These colours are to die for. Absolutely gorgeous, but I just don’t reach for it. Obviously not the most wearable every day colours for most people.

Most Used- NP custom

Napoleon

This is kind of cheating.. I made this palette with the Napoleon Perdis colour discs that I bought prior to working there when I did a lot more freelance. This meant that I could always see what I had easily and they didn’t get lost.
Now that I work for the company I use these colours pretty much every time I go to work, along with their quads and loose dusts to create the current look for the moment.
Have to say though I would not recommend this cheap flimsy palette I put everything in. I will defiantly be spending the money on a Z Palette when I get the chance.

Most Loved- Inglot Custom Palette

This is my most loved because my partner Adam made it for me for Christmas. You’ve got the cool tones bright blush which is very me. The green options which I love for my inner corner or lower lash line. And the neutral browny/greys in a light shimmer and regular matte which is great for the crease and blending out colors.

Desert Island- Too Faced Bonjour Soleil

Too Faced Boujour Soleil

Is this cheating? Were they all meant to be Eyeshadows?
Sorry ’bout it! This would be my desert island palette because once my fake tan wore off everyone would realise that I’m actually very close to albino and wouldn’t fit in at all. Plus these can also double as Eyeshadows and have the perfect bronzer brush inside.

Too Faced Boujour Soleil

Also while I am starving to death I can sniff this and remember the better days…

I want everyone to tell me what their all time FAV palette is!
At the moment mine would have to be Too Faced Chocolate Bar.
So what is yours?

Dear Lashes’s Daily Makeup Product Essentials

Now I change up my makeup most days. But these are the main ones which keep popping into my routine.

Napoleon Perdis primer. This is so soothing to my skin and it helps calm my face after I’ve exfoliated in the mornings.

Napoleon Camera finish powder. This is my favorite powder ever! It can be worn on it’s own or to set other foundation for a fuller coverage. It’s the only makeup item I constantly replace without a second thought.

Jordana best lash extreme mascara. I thought when Lauren Curtis spoke about this it only looked good because she had naturally amazing eyelashes, but it is actually such an amazing mascara. It’s my current fav.

If I want bold brows I use the Napoleon Perdis pencil in chocoholic. Setting them with elf clear mascara.

Australis spritz feel so refreshing, not actually sure if it makes a difference but I love the feeling, I apply it a few times a day.

I always change up my foundation, cheeks, eyes and lips so I can’t really say I have a ‘daily’ for them.

What are you daily makeup essentials?

Quick & Easy Hair/Makeup Tutorial for Work

Hey everyone 🙂 I have created 2 looks which are both really quick and easy to do. Both of the looks should only take 10-15 minutes. So there’s no excuse not to give yourself the professional edge and look the part!

I have gone through and used all of the products which I prefer, however you can substitute your favourite for sure.
This is all just to give you some ideas, and inspire some creativity.

Autumn/Winter Khaki Eye Makeup Tutorial

Dear Lashes ran a competition in April 2014 on Facebook to give away a free makeover and photo shoot to one lucky winner.

Milly won this amazing makeup package. Watch the video below for a full tutorial on the steps I took to create this makeup look.

Products Used

  • Estee Lauder eye serum
  • Napoleon Perdis skin renewal serum
  • Napoleon pre foundation skin primer
  • Napoleon Perdis minimal foundation look 4, (discontinued) any minimal coverage foundation will do the job.
  • Napoleon Perdis china doll look 4
  • Napoleon Perdis concealer cream coffee
  • Napoleon Perdis Camera Finish G4
  • Maybelline gel liner, black
  • Smash box full exposure palette
  • Inglot 419
  • Napoleon Perdis eye pencil onyx
  • Napoleon Perdis ultimate contour palette
  • Mac Springsheen
  • NARS Laguna
  • Benefit Bad gal lash
  • Ardell 120 Demi
  • Napoleon Perdis Boudoir Mist look 4
  • Napoleon Perdis Mattastic Rita
  • Face of Australia Classic Nude

I hope you enjoyed this makeup video!